Step-by-step directions from Rag Rugs, Pillows, & More
Braided rag rugs have been popping up all over social media recently as a fun way to upcycle old T-shirts into something both beautiful and useful. One of the greatest draws is that you don’t need much specialist equipment. In fact, you probably have everything you need at home already! As long as you choose colors you love then it is very difficult to go wrong with the design and the only slightly tricky part is the sewing together of the braid. My main advice if you decide to give this project a go, is to take your time when sewing everything together to make sure that the rug lies perfectly flat in the end.
Materials
|
Color Palette: Assorted colors
Tip: I like to use at least four “neutral” colors (here I’ve used two whites, light and dark gray, and navy) to ground the color scheme. I mainly use solid colors (as opposed to patterned T-shirts) to create a bold palette. Before turning your T-shirts into fabric yarn, place them next to each other to make sure the colors complement each other. If any of the fabrics look out of place, choose a different color to replace them.
Directions
1. Choose 14 plain T-shirts in various colors for your rug. Turn all the T-shirts into balls of fabric yarn.
2. Choose the three colors you would like at the center of your rug. I recommend choosing at least one “neutral” color to start with. Tie the ends of the three yarns together to form a knot. Weigh down the knot with something heavy to make the braiding easier.
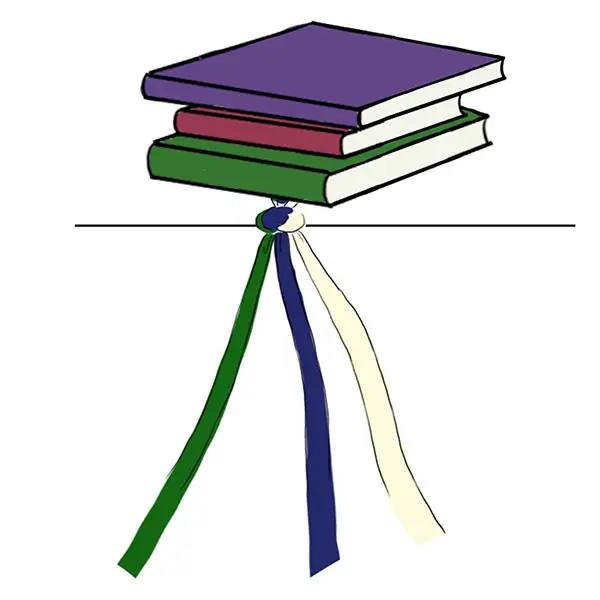
Tip: Before braiding, think through how you would like your rug to look. Braiding similar shades together creates a bold color band in the rug, while mixing different colors together creates a “speckled” look. Do not overanalyze your design—if you are happy with the colors you’ve chosen, then it is hard to go wrong. The colors naturally blend together as one braided color ends and the next yarn is added in.
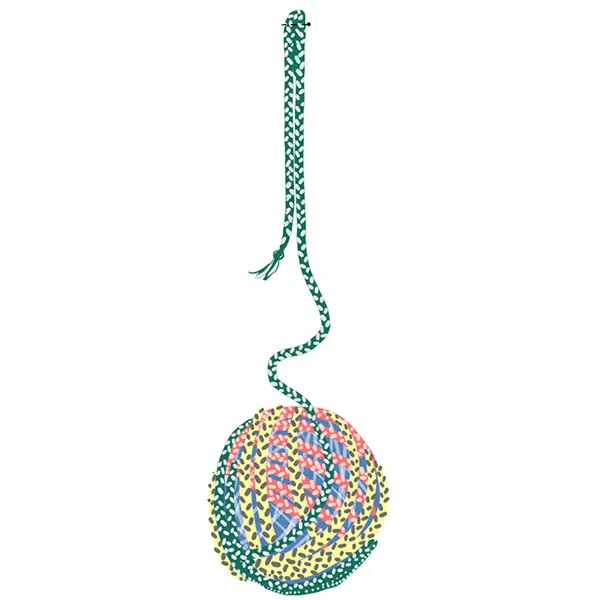
3. Braid the three yarns together, making sure to keep the braid fairly loose. Secure the braid as you go using a clip or clothespin/peg. As you braid, try to tuck in any seams so that they are on the underside of the braid—the tidier you can keep the top of the braid, the neater your rug will look. During braiding, the fabric strands will get tangled in a counter-braid further down the yarn, so untangle them from time to time. Wind the braid into a ball as you go.
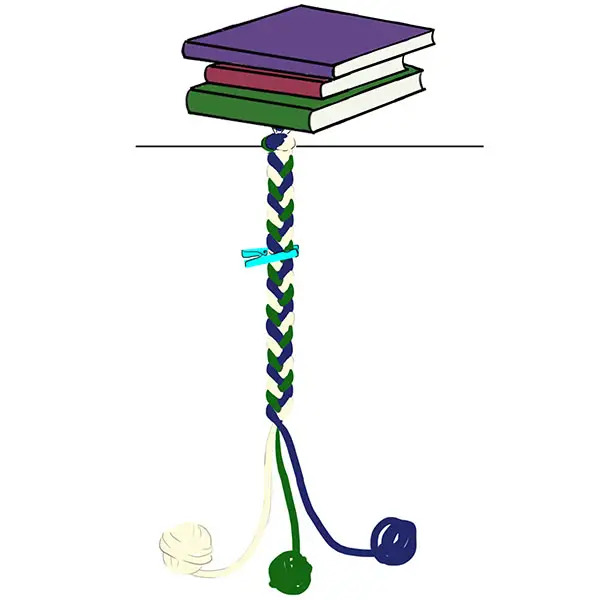
4. When your first ball of yarn is coming to an end, attach the next ball. If you are unsure which color to choose next, unwind the ball of braid and lay it out on the floor in a loose coil to see how the rug is shaping up. Keep braiding until you are happy with the size of the rug, then cut the yarns and tie the end of the braid in a knot.
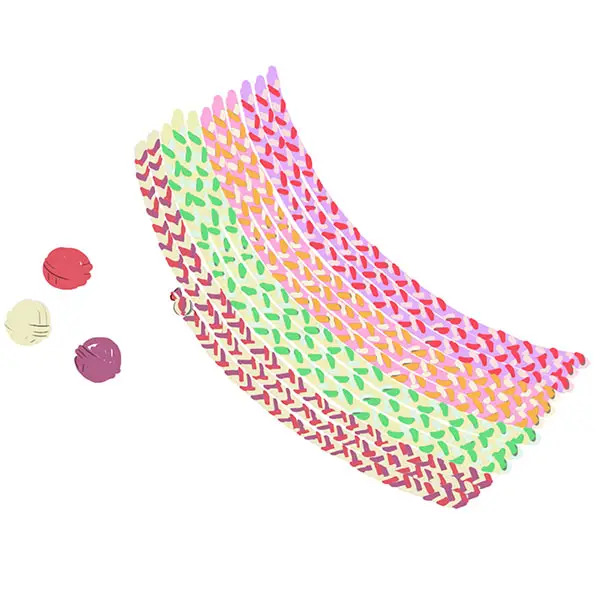
5. Carefully wind the braid into a large ball. The end of the braid that you would like on the outside of your rug should be at the center of the ball.
Before you start assembling the rug: The hardest part of this project is achieving a rag rug that lies perfectly flat. When sewing your braid together, make sure you leave enough excess braid around any curves in the rug. This will prevent your rug from curling up like a bowl.
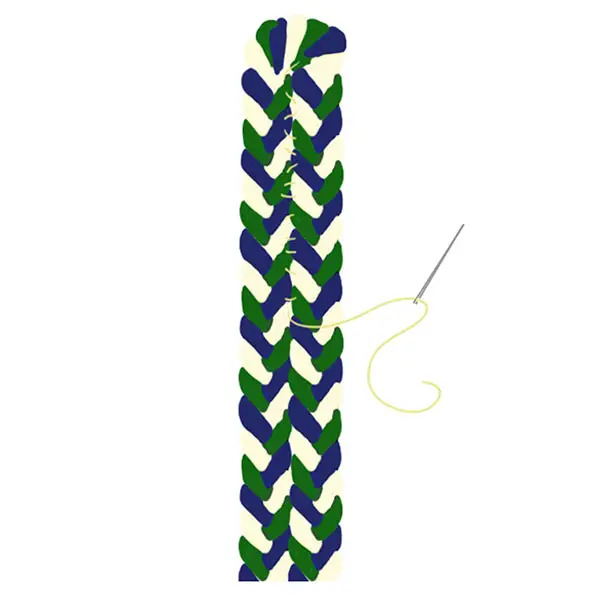
6. Place the beginning of the braid upside down (you will be sewing on the slightly messier side) and measure 22 inches from the end of the braid. Bend the braid back on itself (all the time keeping the braid facing downward) and pin the bend in the braid together to make sewing easier.
7. Starting at the bend in the braid, sew the two inner edges of the braid together tightly so that the stitches are not visible from the neat side of the braid (fortunately it doesn’t matter what it looks like from the back!). When you reach the knotted end of the braid, cut off the knot and sew the loose edge on top of the bend in the braid (still on the underside) to secure it in place.
8. Continue sewing the braid together in a clockwise direction. It is extremely important that you feed the braid loosely around the corners (so that there is excess braid around any curves) or the rug will curl up. It helps to lay your rug on the floor every now and then to make sure that it is lying flat.
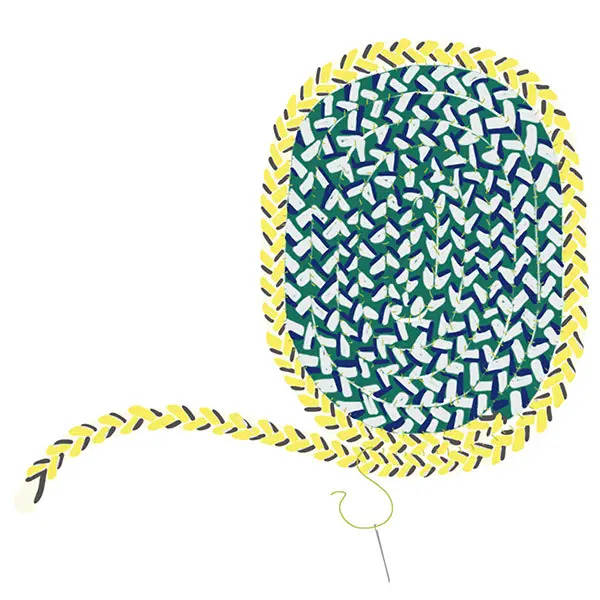
9. Continue sewing your braid in a clockwise direction until you are happy with the size of the rug. It is best to attach the end of your braid to the curved corner of the rug rather than a long, straight edge so that it blends in. Trim the end of the braid and overlap it with the braid inside. Sew it on top to secure the rug.
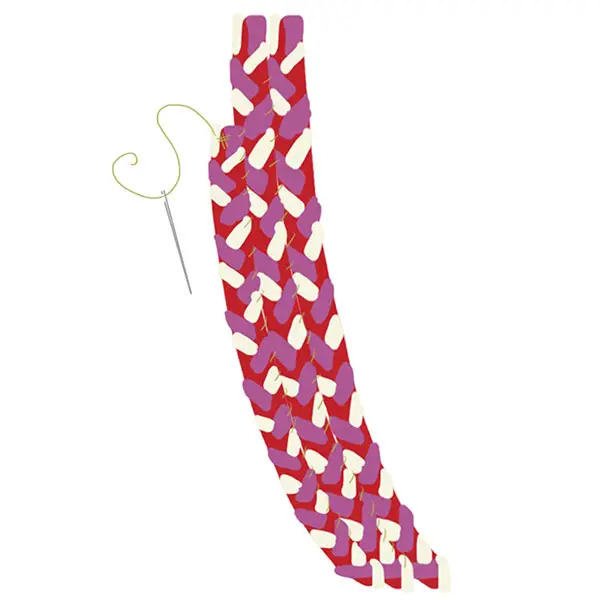
Tip: If you find that your finished rug does not lie flat, stretching the rug out and attaching nonslip backing may fix the problem. Otherwise, lightly dampening the rug, then steaming it flat with an iron can help.
Making T-Shirt Yarn
T-shirt yarn can be used to make braided rag rugs and coasters. Traditionally T-shirts are used, but you can add texture and create a more distressed look by using other fabrics such as cotton.
1. Lay the T-shirt flat, with one sleeve pointing toward you. Starting at the side seam closest to you and working from the hem, cut strips 2-inches wide across the width of the T-shirt, cutting through both layers, until you are around 1 inch from the far side seam. Keep going until you reach the seams of the sleeves—here you cut fully across the T-shirt to separate the neck and shoulders from the main body of the T-shirt.
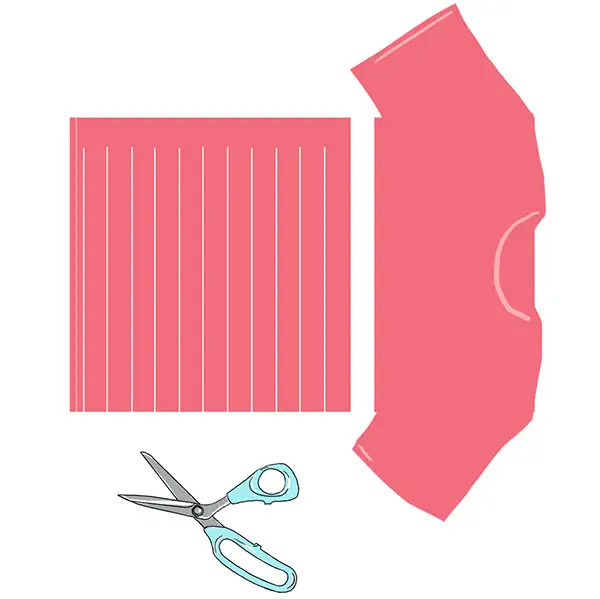
2. Lay out the bottom half of the T-shirt so that the uncut side seam is on top.
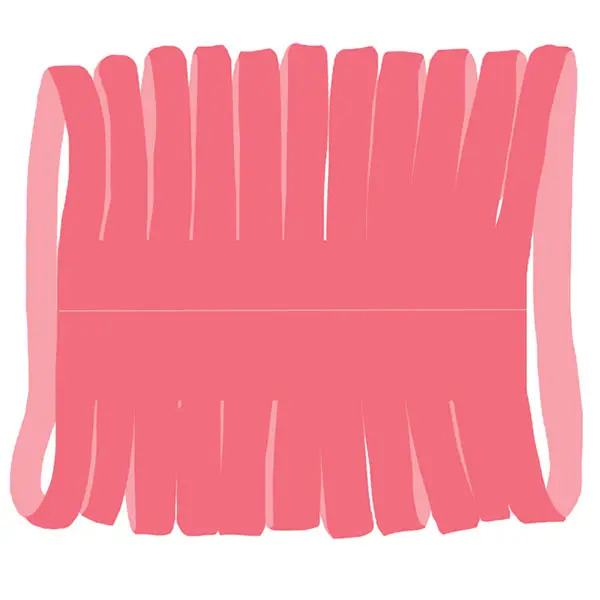
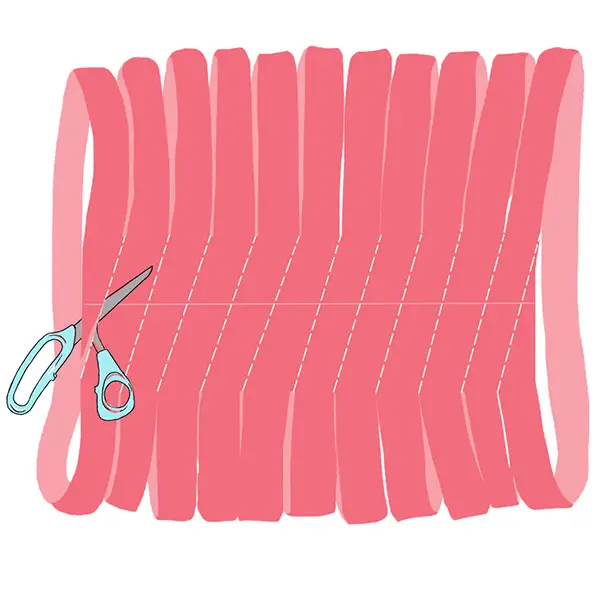
3. To create a long length of fabric yarn, cut diagonally from the bottom hem of the T-shirt below the first slit and below the seam to the first slit above the seam. Continue to cut diagonally from one slit below the seam to the next slit above the seam, creating a long, continuous strand of fabric yarn. Always cut diagonally or you will create short rings of fabric as opposed to one long strip (the cutting lines are represented here by dotted lines).
4. Pull each end of the fabric strip, stretching it so that the raw edges roll in on themselves to form a “yarn.”
5. Cut the remainder of the T-shirt (the shoulders and sleeves) into strips that are as long as possible, avoiding too many seams if you can. Join these strips to the long length of fabric yarn following the Joining Strips method, and wind it all into a large ball.
Joining Strips of T-Shirt Yarn
1. Align the tops of the two strips you want to join together, fold the tops over by about 1 inch, and cut a small slit through both layers.
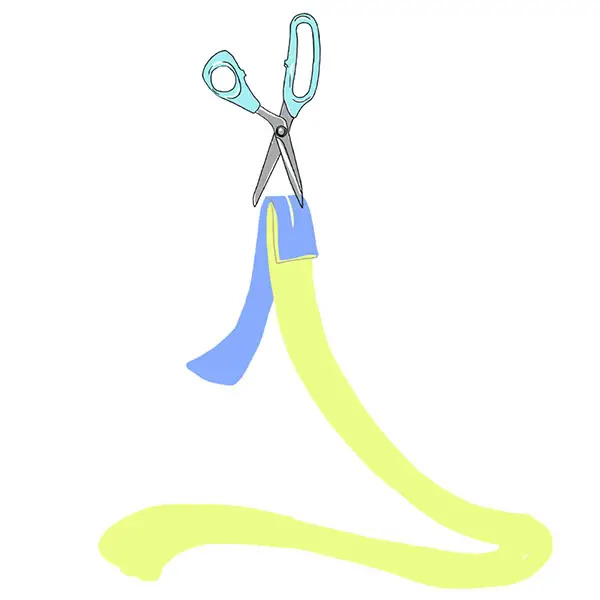
2. Place the shorter strip on top of the longer strip so that the slits are aligned.

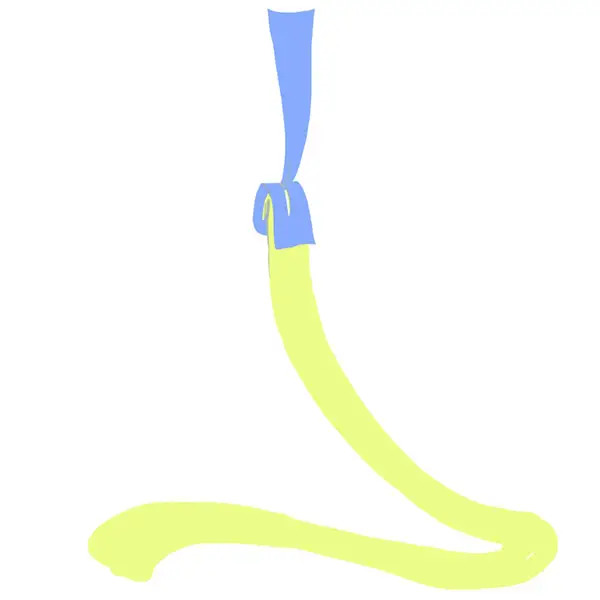
3. Pull the non-slit end of the shorter strip up through both the slits (from the bottom to the top) and pull tight to bind the strips together.
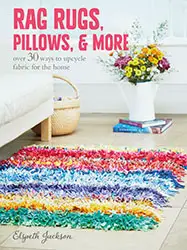 |
Images and text excerpted from Rag Rugs, Pillows, & More by Elspeth Jackson ($19.95) with permission of CICO Books. Photographs by Emma Mitchell. |
RELATED:
Find More DIYs and How-To Guides
Get Family Activities in Your Inbox


