


I long for the days when Halloween was the craftiest of holidays. My favorite DIY Halloween costumes were the ones where my mom and I dreamt up something and had a ball making it happen with few supplies, no special skills, and lots of laughs! The Hershey Kiss costume where she wrapped me in tin foil and added a paper tag, I especially loved. And then there was my zombie prom queen costume when we got a thrifted dress and took it out to the back yard and dirtied it up ourselves, painted my face white and puffy painted a PROM QUEEN 1969 sash. We moms are pulled in a million different directions and constantly pressed for time but a good old fashioned DIY Halloween is easier than you think!
Here are three super easy, done-in-minutes DIY Halloween costumes you can throw together.
Don’t forget the pumpkin! Check out our Pumpkin Patches and Picking in and Near New York City.
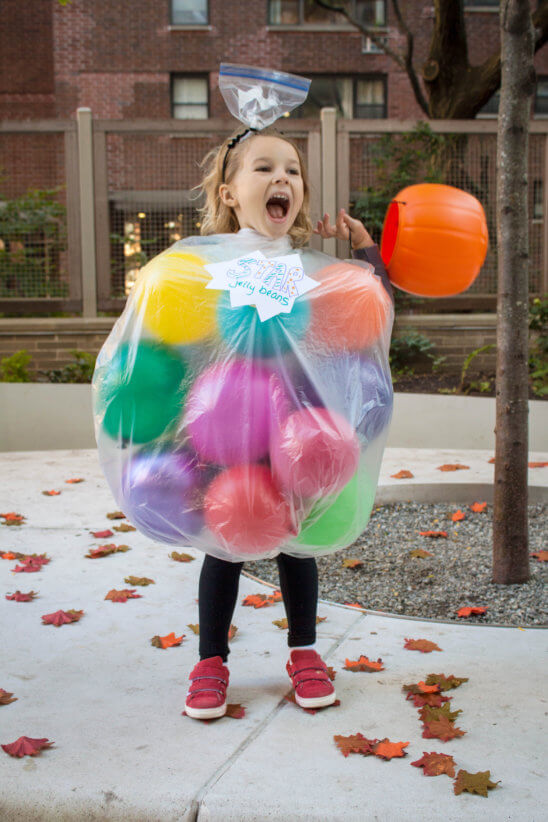
Bag of Jelly Beans
Materials
- Clear Trash Bag
- Basic Black Headband
- Plastic Sandwich Bag
- Latex Balloons in Assorted Bright Colors
- Black Pipe Cleaner
- Cardstock *
- Markers
- Scissors
*Everything with a * can be a compostable/biodegradable version to be nice to mother earth!
Instructions
1) We all know you are full of hot air! Use it to blow up around 20 balloons without passing out! Take lots of breaks.
2) In the base of the trash bag use scissors to cut leg holes out and armholes near the opening of the bag but leaving enough room at the top of the bag to tie the back shut behind the costume wearer’s back once the bag is on and full of balloons. There are no exact measurements! Just eyeball your kid and eyeball where to make the leg and armholes.
3) With scissors cut a label out of your card stock in a creative shape (consider a star or a heart shape) to create a label for your bag.
4) Bunch up the base of the sandwich bag for the head-piece and twist the pipe cleaner around it and then twist the pipe cleaner around the headband to create the top of the bag.
5) Next, assemble that bag of sweetness! Put the trash bag on and start dunking in the balloons. Next, seal up the bag by tying the access plastic around the back or bunched up at each shoulder…whatever is more comfortable.
6) Lastly, tape on with Scotch Tape your label and put the headband on your cutie.
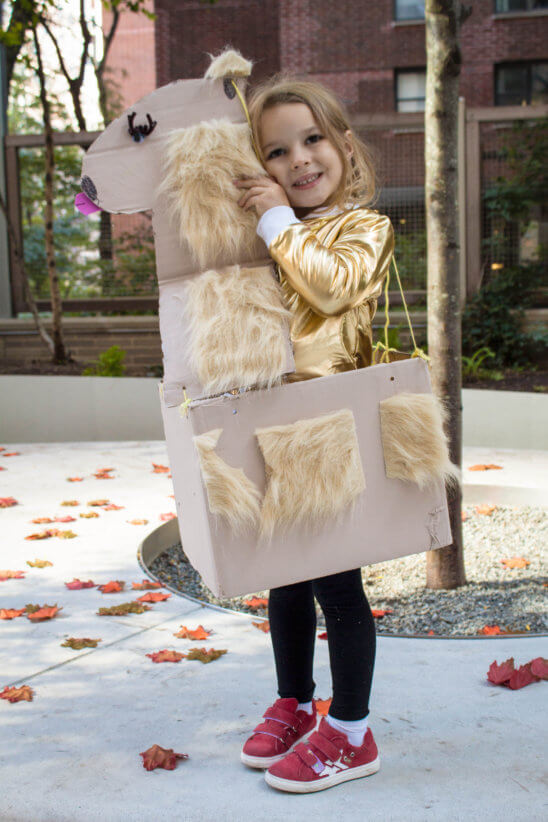
Llama Drama!
Who doesn’t love a fluffy doe-eyed llama?! Create a sidekick llama for your mini with these super easy steps!
Materials
- A cardboard box large enough for your llama rider to be able to stand in
- Scissors and/or Box Cutter
- *Tan Craft Fur
- Googly Eyes
- Tan Tempera Paint (or acrylic paint but be careful because acrylic paint can stain)
- Brown Pipe Cleaners
- Yarn
- Black Marker
- Pink Foam Sheet
- Tacky Glue
*Can’t find tan craft fur?!? Painting stretched out cotton balls works great!
Instructions
1) First, cut the top flaps off the box (save at least one for llama head) and then guesstimate the size leg holes you need by first sketching the outline and then cutting them out. On the flap for the head draw a long neck and oval shape for llama head. Cut the head and neck shape out of the flap in one piece.
2) Have your kiddos help you paint the box and llama head. Perfect is boring and crazy brush strokes make for a more unique and special llama.
3) Cut your pipe cleaner into one-inch pieces for the llama’s eyelashes. Then, cut patches out of the fur, cut a short tongue out of the pink foam and draw a black line down the middle. Fun fact: llama tongues only can stick out about a half of an inch!
4) Hole-punch or use a box cutter to put two holes opposite each other in the front of the box and then align two more holes directly across from them in the back of the box. Then punch a hole in the top of the ear of the llama and the base of the neck. Lastly, make a hole in the middle of the back of the box. Weave your yarn first from one front hole to one back hole making shoulder straps and tie to fit your little one’s needed length so they can wear the box on their shoulders.
5) Next, tie a long loop through the ear hole so your little can wear the head around his or her neck and hold on top the yarn like reins. Lastly, tie one more piece of yarn from the neck hole to the hole in the middle of the back of the box to attach the neck and the body of your llama leaving it loose enough so your little one can stand to wear the yarn comfortably.
6) Glue an eye on each side with the curly pipe cleaner eyelashes glued on top! Glue on the short little tongue and patches of fur in adorable places. Now you’re ready for plenty of Halloween drama with your llama!
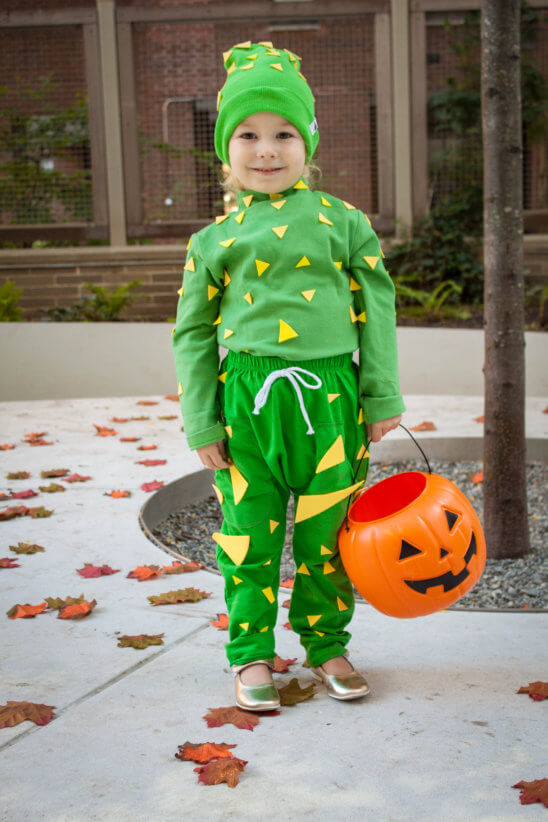
Easy Cactus
It doesn’t get cuter or cooler than this one.
Materials
- Green Turtle Neck
- Green Sweat Pants
- Green Beanie
- Yellow Foam
- Glue Gun
- Scissors
Instructions
1) Cut a lot of random and varying triangle spikes out of the yellow foam. Do as many as you want to create a spikier or more sparse cactus. We used about 100!
2) Squirt the hot glue onto the triangles and then stick them on your hat, sweats, and turtleneck.
3) That’s it… and now you’ve got one dangerously cute cactus!
The Craft Studio is located at two locations:
Tribeca 174 Duane St, New York, NY, and Upper East Side 1657 3rd Avenue, New York, NY
For more DIY Halloween costumes, visit craftstudionyc.com