How to Spring Clean Your Pantry
It’s hard to believe we’ve been pandemic living for an entire year now! There’s no doubt our kitchens have been working around the clock for our families, and it’s time to give them the TLC they deserve.
Psst…For more cleaning tips, check out Back-to-School Organization Secrets!
Whether you’re swimming in pandemic related backstock items, or just need to hit the ole reset button to clear the clutter, I’m breaking down how to clear out and spring clean your pantry in 5 easy steps:
So let’s break it down, shall we?
What you’ll need before you begin:
• A vacuum/hand vac
• Hot soapy water or preferred cleaning solution
• Cleaning Cloths or sponge
• Sharpie & Post-its
• Measuring Tape
• Label Maker or Paint Pen
1. Clear Everything Out. Yes, Everything.
With spring in full swing, now’s the time to dive in, and give your kitchen the deep spring clean it needs. Whether your pantry is a single cabinet or a full sized closet, here’s how to begin:
• Pull items out one by one and place them on your counters, kitchen table, or if you’re really low on space, the floor!
Don’t worry about what you’re pulling out or where it needs to go (what is that sticky stuff on that can of beans anyway?), just focus on emptying every nook and cranny of your dedicated pantry. We don’t want to get too caught up in our feelings towards an item, so it may be best to set a 15-20 minute timer or enlist your kids to get the emptying done!
2. Wipe it Down
• Grab your vacuum or hand vac to do some of the initial work for you. Crumbs, dust, and all kinds of debris can sit loosely on the shelves, so give it a once over first.
• Depending on the type of cabinets you have, will depend on the best method to clean them. Hot, soapy water with a sponge or cleaning cloth is always a good option, but you can also utilize an all-purpose cleaner, white vinegar, or even baking soda (especially for those sticky spots!) Give your cabinets a thorough clean, and be sure to wipe them completely dry once you’re done.
Pro Tip: we all know how precious Clorox wipes have been, and if you’ve managed to grab a few, be sure to save those for your counters, doorknobs or high traffic zones. Although they work on all hard, non-porous surfaces, they can discolor or eat away at certain finishes or sealants. This is why it’s always best to stick with good old fashioned hot, soapy water!
3. Edit & Take Inventory
It’s true that we don’t really know how much or what we have until it’s all staring us in the face. This is where you’ll need to roll up your sleeves a bit to assess what you have.
• Toss anything expired, stale, or near empty (also known in my house as the Triscuit box with exactly 1 1/2 crackers left – thanks family!)
• Separate unused, non-expired, questionable items (if you have to think about whether you would consume it, or how you would begin to cook with it, it’s a go.) We want to make sure we are setting aside anything worthy of being donated. If there ever was a time to phone a neighbor to see if they may need something you would never use, now is it!
• Take inventory of your remaining items and start to group them into broad categories of what they are and how you use them. This can be as simple as breakfast, lunch, dinner, snacks, or you can further categorize how you see fit: canned goods, pasta, grains, baking, kids snacks, etc. The last thing we want to do is overly categorize and complicate our systems, so aim for 10 categories or less. If you’re swimming in Costco sized quantities (15 boxes of mac & cheese), or pandemic related items (extra water or canned food), place those items in a separate category labeled “bulk” or “backstock” so that multiples aren’t cluttering those everyday zones.
Pro Tip: Place items that overlap categories in one single category that makes the most sense to you. For example, if you consider applesauce a snack and a baking staple, but more often utilize when you bake, place ALL of your applesauce in the baking category. We don’t want it in both because we will inevitably forget it’s stored in multiple spots, and we’ll mistakenly keep replacing it.
4. Put it All Back
Once you’ve determined what’s remaining, give everything a good wipe down, and assign “homes,” or a designated spot for each category to live. Frequently used items should go in those prime real estate areas so they are within easy reach for you. Try space planning by writing down the category names on Post-its, and placing them on your shelves or drawers to test the flow before anything gets put away.
Don’t forget about items your kids need to access themselves (think healthier grab ’n go items lower down), as well as items you don’t wish for them to have easy access to (like that secret stash candy jar above the fridge because moms should be allowed to snack in peace too!)
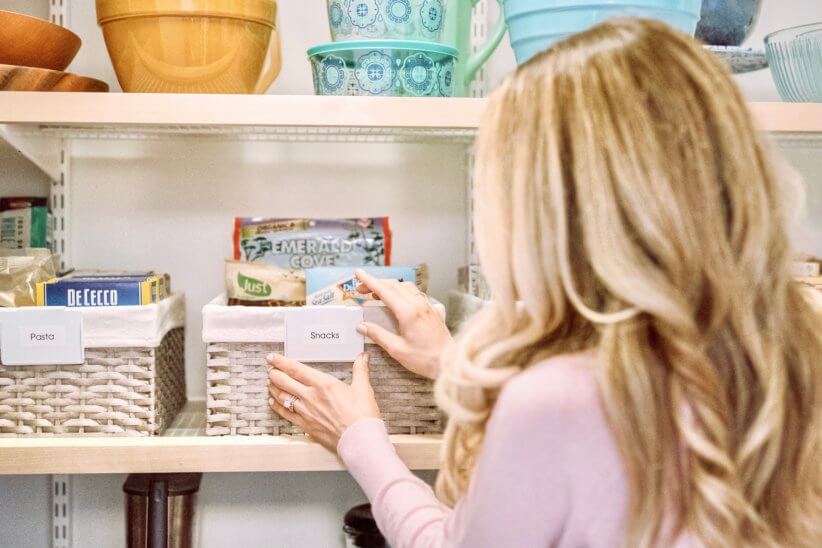
5. Contain & Label
This is everyone’s favorite part (your hard work is about to pay off big time!), but it’s important to resist the urge to excitedly purchase organizational products before measuring.
While categories help you determine how much containment you need, taking careful measurements is the only way to ensure what will actually fit (and maximize) your space. You may have a few organizational items on hand already, or you may wish to completely streamline and start anew. No matter how you choose to contain, don’t skip this essential step!
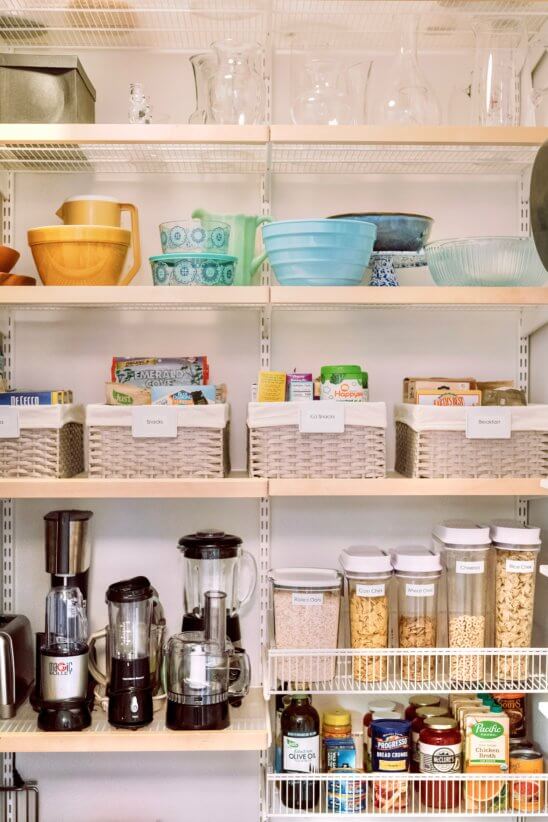
Deep shelves? Try deep bins! Tricky corner? Try a lazy Susan! Sprawling drawers? Try a few drawer dividers! Have fun with it, and choose containment that elevates your style and that will work seamlessly for you and your family. I love utilizing products that are wipeable (glass, plastic, etc.), or have a machine washable lining (inside certain woven baskets) for ease of spring cleaning and overall upkeep.
Once everything is contained, it’s time to label! I recommend utilizing a label maker, or simply hand writing labels with a paint pen. Customize the categories with language you and your family use (ie: if you refer to pasta as “noodles,” label it noodles!) Labels are essential, as they make everyone in your family accountable, from putting groceries away in their proper place, to taking inventory before a grocery shop, or simply for setting limits on what gets overly stocked.
Pro Tip: When organizing, consider decanting frequently used items (that you buy week after week) into air tight containers like your favorite snack or cereal. Packaging can be cumbersome and bulky, and while there is an initial time investment with this method, your pantry items will keep fresh longer, and you’ll have a clear visual when something is running low (no more near-empty boxes of Triscuits or cereal!)
Remember, there is no right or wrong here when it comes to the hub of your home, as long as the solution is practical and manageable for you and your family!

Laura Kinsella is the founder of Urban Organyze, a New York based home organizing company that transforms your mess into meaning and clutter into calm. Since 2015, Laura has empowered hundreds of women to gain more clarity and control, by creating homes that are efficient, elegant, and easily adapt with the demands of a growing family. As a born and bred New Yorker and mom to a growing preschooler, Laura’s mission is to support fellow moms towards their vision of a healthier, lighter, and more organized life. Laura has been featured in New York Post, New York Family, Apartment Therapy and more. For inspo, please visit urbanorganyze.com, or follow @urbanorganyze.

