There’s an abundance of arts & crafts classes, festivals, and events for kids in NYC, so it’s easy to forget about the DIY crafts that you can do at home. Crafts are such an important part of childhood, because they encourage creativity. Kids can imagine, experiment, and design with the paint brush, crayon, or glue in their hand. But the most important aspect of arts & crafts is the way that they spark self-confidence. When kids are proud of what they made, they’re proud of themselves. This feeling of confidence is crucial in child development. Not only are crafts educational and fun for kids, but as a parent, these are the moments that you’ll look back on one day: when you showed your kids how to sponge paint and saw the smile light up on their face when they finished their artwork. You can keep these crafts for years to come. We’re sure you heard of the mainstream crafts, but there are so many unique arts & crafts ideas out there. Each time of the year has its own set of season-inspired crafts, and we love the summer ones! Summer crafts are a great excuse to head outdoors and not worry about the mess inside. And now that school’s out, there’s a lot more free time to get crafty. We compiled a list of the best crafts to do with your kids this summer, involving a variety of different art mediums. Check out our craft ideas, and start your summer of creativity now!
In addition to crafts, summer is also the season of reading. If you’re looking for book suggestions, we’ve got the ultimate guide to summer reading books for kids, from early readers to young adults!
Discover Family Fun
-
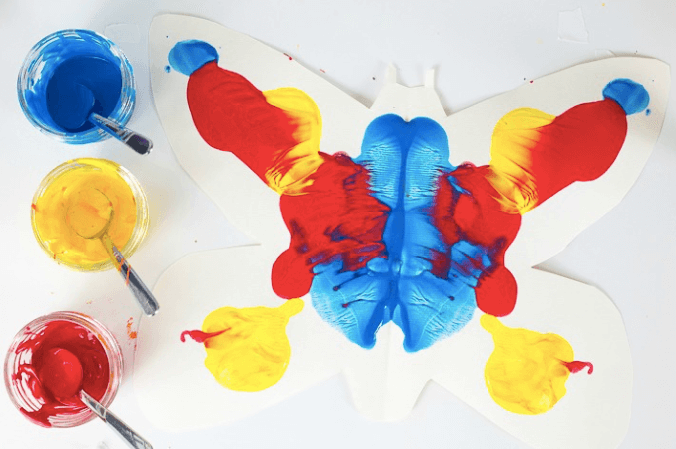
Butterfly Symmetry Painting
Paint, create, and teach your kids all about the mathematical concept of symmetry in this craft. We recommend buying large, colored construction paper so that you have more room to paint, but you could also use regular sized. Let your little one choose their favorite color from the construction paper, and then fold the paper in half (hamburger style). Trace a pencil outline of a butterfly and then cut along the outline. When you unfold your paper, you should have a butterfly shape! Now the fun part comes, and this is where the kids really come in, because you’ll likely have to trace and cut for them, depending on their age. Squeeze a few paint colors onto a paper plate or palette, and paint only one half of the butterfly, leaving the other half completely blank. After your kids are all done creating their one-sided masterpiece, carefully fold the painted half of the butterfly over to the blank half and lightly apply pressure. Then unfold the butterfly, and you’ll have a perfectly symmetrical, beautiful butterfly! This trick works with other shapes too, so your kids can paint a heart or just a square/rectangle. But we like the butterfly, because butterflies are characteristically symmetrical.
-
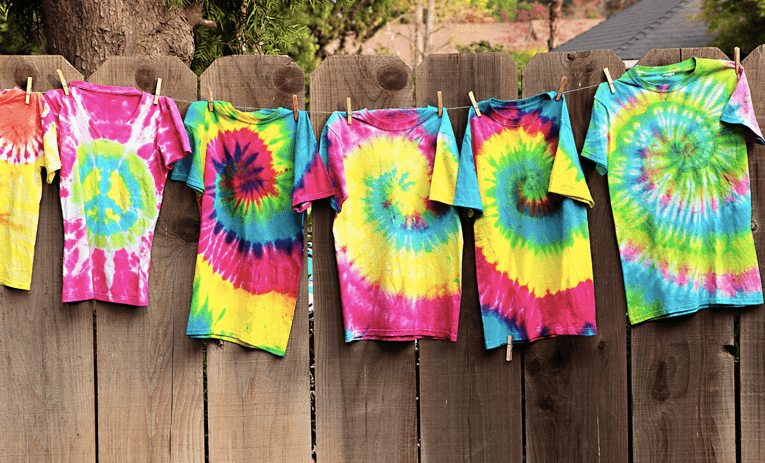
Tie-Dye T-shirts
Both a fun craft and a practical clothing item, tie-dye t-shirts should definitely be on your craft bucket list this summer! Kids love placing the different colors on their t-shirts and unwrapping the shirt to see how it turned out. We recommend that you purchase a tie-dye kit that comes with non-toxic dyes, rubber bands, and design ideas. While you could follow the instructions for a certain design, you could also just go freestyle! Use old clothes, tote bags, or a white pillowcase. You could also buy cotton, white t-shirts if you don’t have anything at home that you’d like to tie-dye. Wrap the rubber bands around in the design and directions of your choice, squirt the colors on, and let the t-shirts dry in the sun for a few hours. This is for sure an outdoor activity- you don’t want the dye to get on the carpet or furniture inside. The outdoor venue is part of the fun- choose a sunny day and head outside with all of your supplies!
-
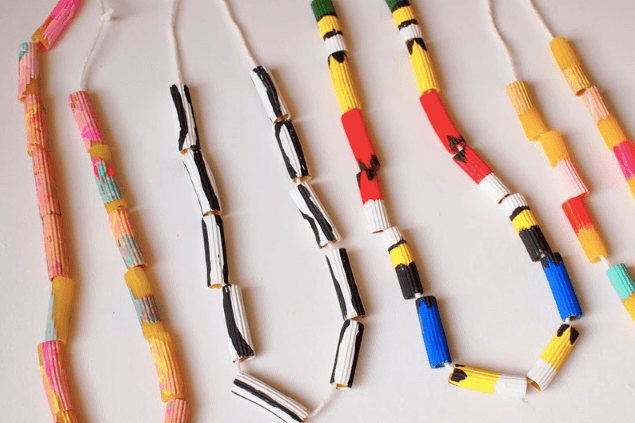
Pasta Necklaces
Kids love making something that they can wear and show off to their friends at camp afterwards. Pasta necklaces are unique, and a great way to personalize an outfit! Dump a box of uncooked, penne pasta into a bowl…yes, that’s right, we’re using real pasta! Let your kids paint each noodle any color or design that they please. We recommend laying down a garbage bag or newspapers underneath, because the painting can get pretty messy. You could also move this pasta party outside. After your pasta dries, it’s time to place it on yarn. Parents, you should probably measure and cut the yarn for your kids so that it fits, and then they can string on their painted penne. To make it easier for your little ones, attach a piece of tape to one end of the yarn to keep the penne from slipping off the end. Then tie the two ends of the yarn together, and you have your very own, fashionable penne pasta necklace! You could also do this craft with other forms of pasta, like wagon wheels or elbow macaroni, but we find penne to be the easiest to both paint and string on the yarn.
-
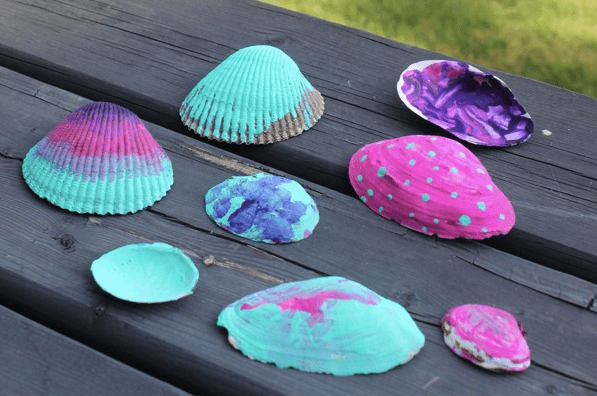
Seashell Painting
If you’re headed to the beach this summer, whether it’s NYC’s public beaches or a beach on your island getaway, seashell painting is always a must-do. Kids love collecting seashells on the beach- sometimes even more so than painting them! Tell your kids to find the very best seashells that they can, and if you have two or more kids, the day will likely turn into an exciting, seashell hunt competition. When you return from the beach, prolong the summer fun by bringing out a few paint colors for your kids to decorate the seashells that they found.
-
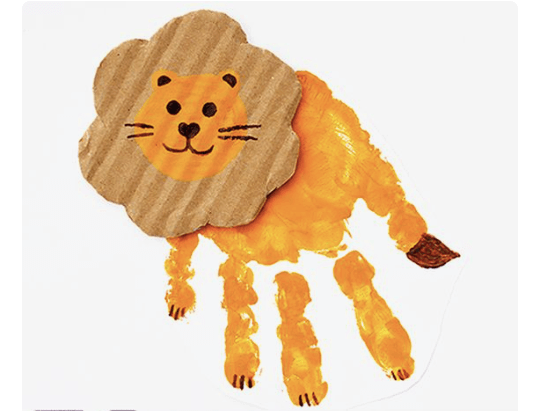
Handprint Animals
Handprint crafts are perfect for kids and adults, because kids love the feeling of paint on their hands, and parents love seeing their child’s little handprint on the page- something that they can look back on years later. Let your kids choose their favorite animals, and then dip their hand in the paint color that best fits the animal. If the animal is multicolored, there are a few ways to go about the paint. You could dip your kid’s whole hand in the base color of the animal. For example, if the animal is a giraffe, do a yellow handprint onto a canvas or piece of construction paper, and then paint the brown spots on afterwards. If the animal is multi-colored, you could paint your kid’s hand with the colors of the animal, and then let them press their hand down. Warning- this option is very ticklish! The handprint ends up being the body and legs of the animal, although in the case of a bird, the two handprints are the wings! As the handprint dries, start constructing the animal’s head using construction paper and googly eyes. Cut out the shape of the head from construction paper, and use other construction paper colors to add details. Glue the head onto the handprint, and there’s your animal! If your kids still have some more creative energy in them, let them color in a background for their animal, such as a barn or a tropical jungle!
-
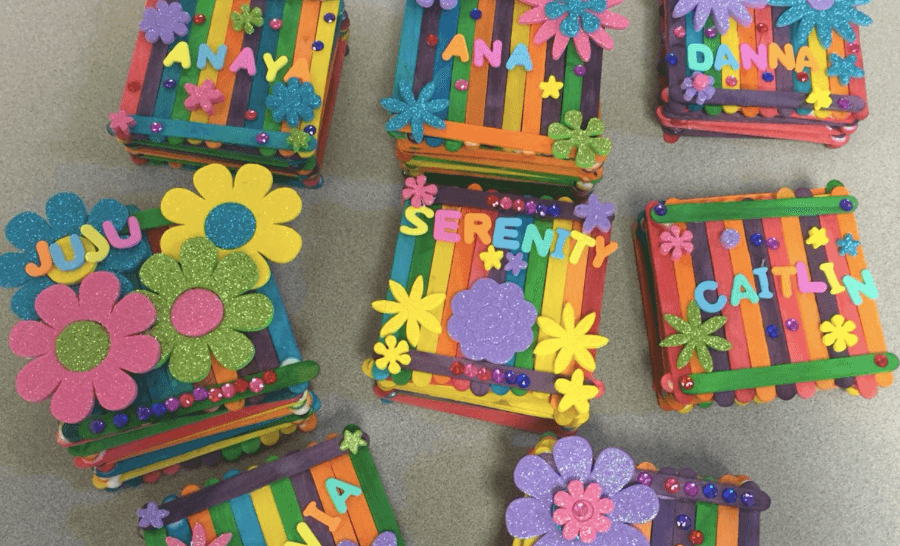
Popsicle Stick Treasure/Jewelry Box
Popsicle sticks are a fun and different medium to get crafty this summer. Kids love having something of their own to keep their little treasures in, so we have this popsicle stick treasure or jewelry box craft so that they can make their own colorful box! Buy a pack of rainbow popsicle sticks and bring out the Elmer’s liquid glue. To build up the box, lay two sticks down, parallel to each other, and then glue two other sticks to the corners, perpendicular so that you form a square. You might want to do this first step for your kids, and then let them continue building the walls of the box up as high as they want. To form the foundational base, glue down popsicle sticks side by size, across the final layer of the box walls. If your kids want a lid to keep their treasure safe, then lay down popsicle sticks on opposite sides of the top of the box, covered with glue. Place popsicle sticks perpendicular to these two sticks, side by side. After the box dries, you should have the treasure box and a removable lid! Decorate the box further with glitter, foam pieces, stickers, and sequins.
-
Summer Reading Bookmarks
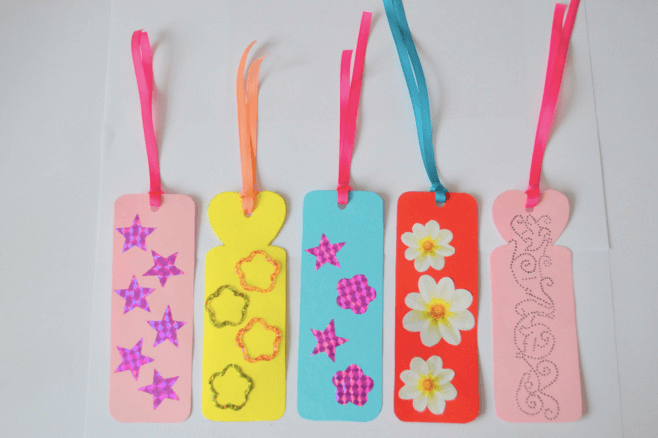
Encourage summer reading by making your own, decorative bookmarks. You want your bookmark to be sturdy, so we recommend cutting a rectangle out of colored cardstock paper. Hole punch a hole at the top of the rectangle, and use either ribbon or yarn to tie a little knot through it, letting the ribbon hang. The decorating part is really up to you! You could use crayons, markers, or paint. Another idea is to cover the bookmark in sequins. We also love using scrapbooking paper, which comes with lots of different colors and patterns! Make summer reading fun with a bookmark that your kids love designing and using afterwards. Looking for summer reading suggestions? Check out our summer reading guide!
-
Make & Bake Suncatchers
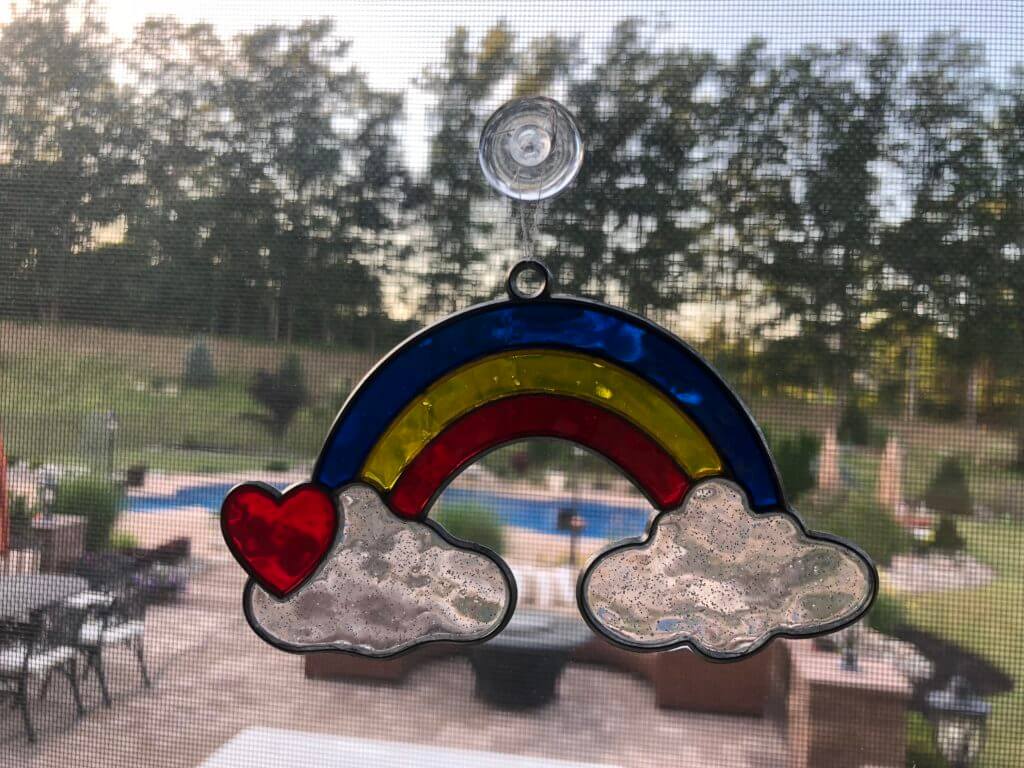
Suncatchers are the perfect way to both unleash all of that creative energy and add a pop of color to your windows. While you could paint your own suncatchers, we recommend the make & bake style, because there’s less of a mess, and the finished product captures the sun beautifully. Each kit comes with a metal outline of a design; you can choose from a butterfly, octopus, unicorn, rainbow, turtle, dog, plane, and many more. The kit also comes with baking crystals and a suction cup. Lay a piece of foil on a cookie sheet and place your suncatchers on the foil. Then fill the design with the different colored baking crystals. You can use your fingers, but it’s a lot easier to cut a straw at an angle and use the straw as a little scooper. The best part about the make & bake version of the suncatchers is that no matter how you fill your design, whether you follow the example on the box perfectly or you mix the colored crystals randomly, the stained glass final product looks crisp and colorful- especially when the sun shines and illuminates the colors. After you’re all done filling in the design, place your suncatchers in the oven on the cookie sheet for about 15 minutes, or until all of the crystals have melted. Let cool for 20 to 25 minutes, and then stick a piece of thread through the hole at the top, and tie a knot. The thread goes around the suction cup, and the suction cup sticks to the window. Often the kits give you more crystals than needed, so if you have leftovers, make your own suncatchers using cookie cutters. It’s the same exact process- just use your metal cookie cutters as the templates instead.
-
Mod-Podge
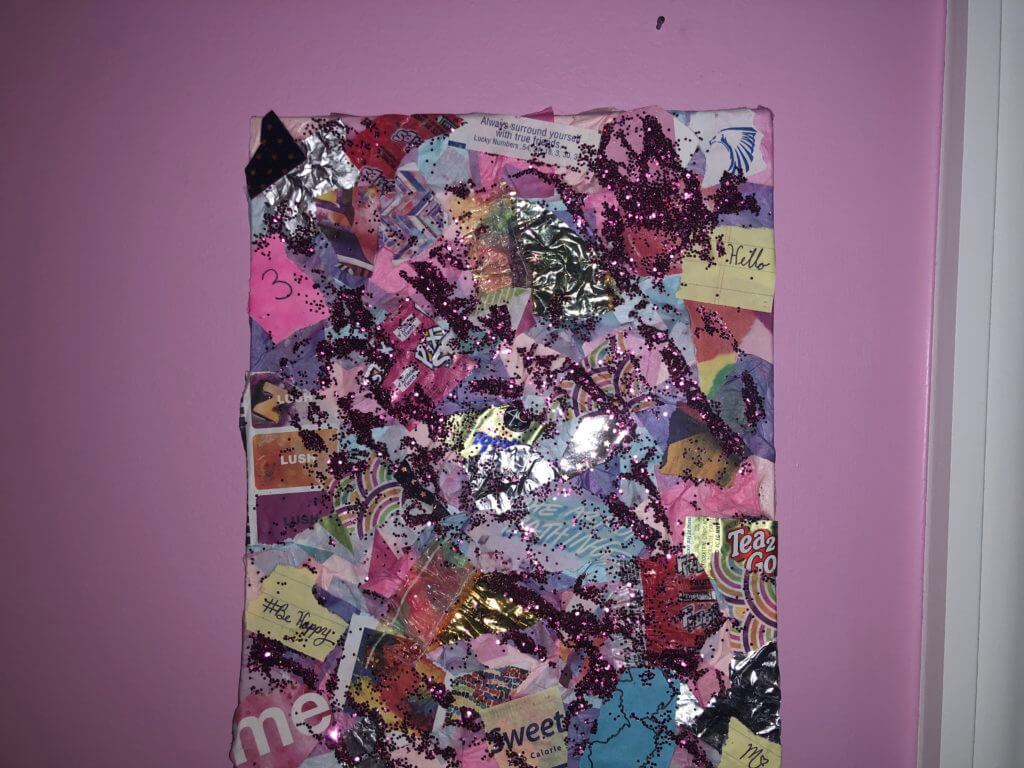
The best part about mod-podge is that you can literally mod-podge anything! Some ideas include vases, wood letters for the first letter of your name, jars, and mini canvases. Now, let’s back up. What exactly is “mod-podge?” It’s sort of like creating a collage using tissue paper, mod-podge glue, and any other pieces of paper of your choice, from candy wrappers to magazine cutouts. Kids love adding glitter to the final product! I find that tissue paper squares work best, and then let your kids pick out other wrappers and papers that they want to include. I’ve used Hershey bar wrappers, aluminum foil, pieces of old letters or cards, and little cut outs from ad books or magazines. You could even let your kids print out images of some of their favorite things, like their favorite animal or food, to include. After you collected the scraps, just paint on a bit of mod-podge glue, one by one, and paste the scraps on the object that your mod-podging. Don’t worry about overlapping and covering up some of the pieces- it’s meant to have a very eclectic look. When you’re all done, add some glitter so that your mod-podge piece sparkles!
-
Ice Cream Art
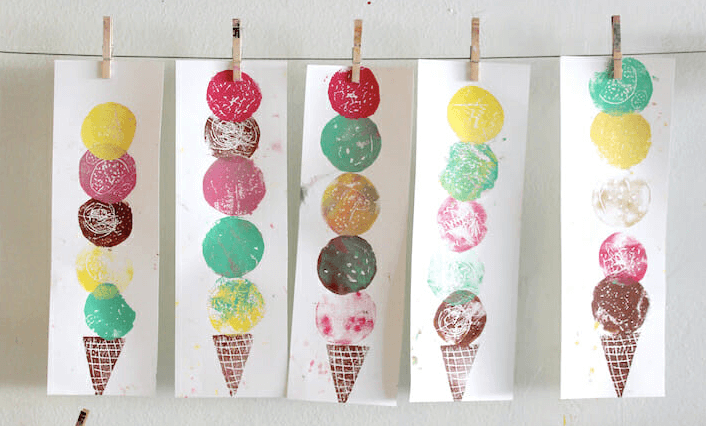
On a hot summer day, an ice cream cone sounds like a pretty sweet treat. But before you head out to the ice cream shop, get crafty with ice cream art. All you need is a foam sheet, paint, and either lengthy drawing paper or a miniature canvas. Parents, pre-cut a circle and an isosceles triangle from a foam sheet – the circle will be your stamp for the ice cream scoops and the triangle is for the cone. Using a palette or paper plate, choose a color for the cone and squeeze some of the paint color out. Dip the triangle-shaped foam piece into the paint and then press the foam at the very bottom of the paper or canvas. One-by-one, let your kids pick their favorite ice flavors, and squeeze that paint color onto the palette. Dip the circle into the paint, and then press it onto the canvas to form your ice cream scoops. Keep building the ice cream cone until the very top of the paper or canvas! Your kids will love thinking of their favorite flavors and then seeing their completed, dream ice cream cone.
-
Do-A-Dot Garden
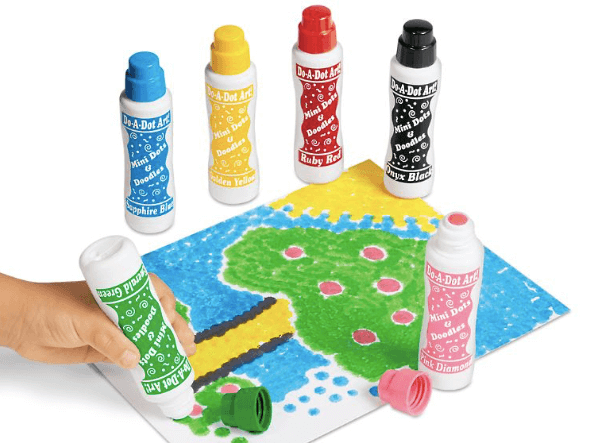
The flowers are flourishing in the summer, so why not capture the beautiful garden scene in a craft? Do-A-Dot Art uses dot markers that have a sponge tip applicator. The best part about these markers is that there’s no mess involved! Simply stamp onto the page for a perfect, colored dot. Use a piece of construction paper or cardstock paper to create your scene. Let your kid’s imagination run wild as they design their own garden with flowers, caterpillars, garden decor, trees, and of course, the bright sun in the sky. We love the dot markers, because they’re easy for kids to use, non-toxic, and very versatile. Maybe you’re kids aren’t into flowers- well they can just as easily create a different scene: a pirate ship, the solar system, or a castle!
-
Crafts Inspired by Your Kids’ Favorite Books
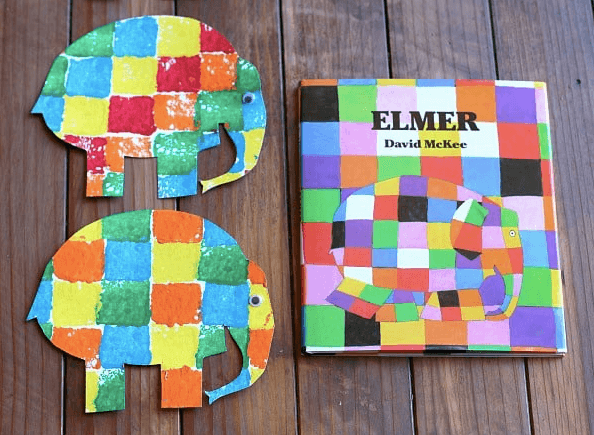
Bring your kids’ favorite stories to life through interactive crafts! If your kids enjoy a book, expand on that enjoyment with a learning-enrichment activity. You can keep it simple and create the main character using either construction paper or paper plates. In the famous children’s book, Elmer by David McKee, recreate Elmer, using sponge-painting. Print out an elephant traceable, cut sponges into small squares, and sponge paint Elmer’s colorful patchwork! This craft works just as well if you just have your kids color their favorite part of the book on a blank piece of paper. In Dr. Suess’s Green Eggs and Ham, your little ones might draw a picture of the green eggs and ham in their favorite spot mentioned in the story. The craft is less about the decor and the final outcome, and more about continuing that love for reading in an interactive activity. If you’re looking for some summer reading suggestions, check out our guide for summer reading, from early readers to young adults!
-
Cupcake Decorating
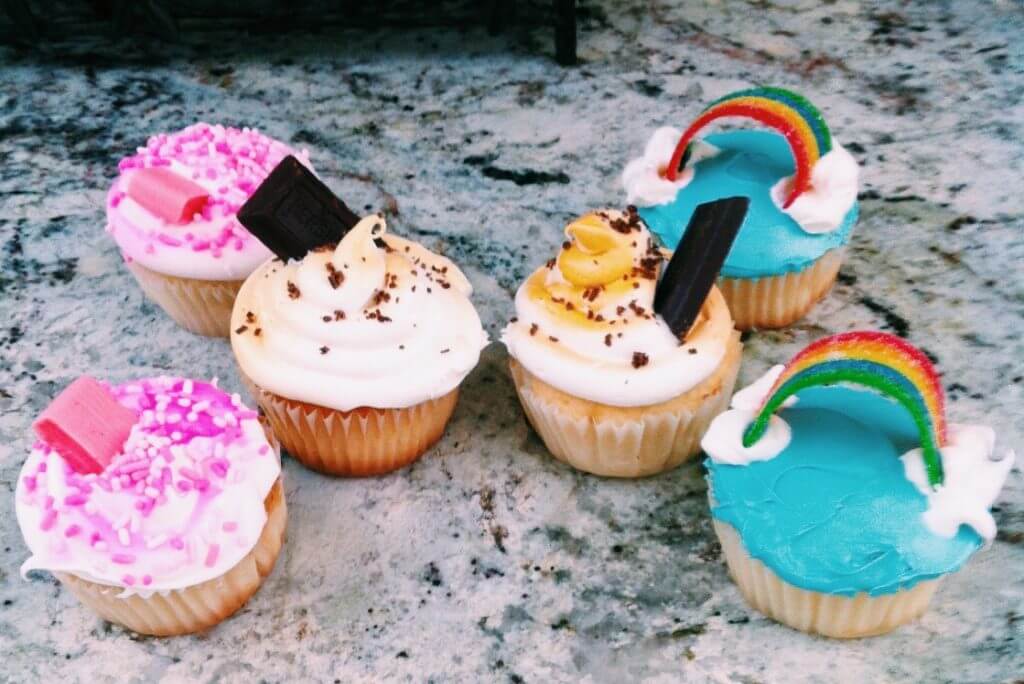
How could you refuse a craft that you can both create and eat? In order for this craft to not be too time consuming (and to get to the fun part quicker!), we suggest that you prebake the cupcakes. After the cupcakes cool, lay them out on the counter, along with plenty of napkins! Also lay out a variety of toppings for decorating. Some ideas are crumbled cookies, rainbow sour airheads, sliced fruit, chocolate chips, mini marshmallows, rainbow sprinkles, M&M’s, starbursts, coconut, and chocolate syrup. Scoop store-bought vanilla icing into a few different containers, and let your kids choose their favorite colors to dye the icing. You could either smooth the icing out on the cupcakes using a butter knife, or you could check out our “look like a pro” icing hack! Snip a tiny hole in the corner of a large ziplock bag, and stick the icing tip of your choice into the hole. Then scoop the icing into the bag, aiming towards the tip, and twist the bag tight. Now you have your very own piping bag, without having to buy one at the store! Pile your icing high for a professional look. Let your kids get creative with the toppings- don’t argue when they want to put strawberries, rainbow sprinkles, and coconut all on the same cupcake (though maybe suggest a different combination). Though technically a baking activity, we consider this also to be a craft with the level of creativity involved.
-
Sponge Sailboats
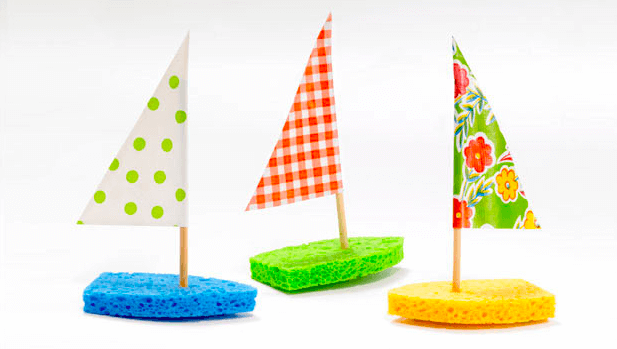
Create your own miniature sailboats this summer! Buy a few different-colored sponges, and cut the sponges in half. Let your kids choose the color of their sail, and cut a piece of construction paper into a triangle. Glue the sail onto a wooden skewer, and stick the skewer through the sponge. That’s it- you’re all set to sail! You can sail your mini boats in the tub or in a lake nearby, but be sure to let the sponge absorb the water before you let go.
-
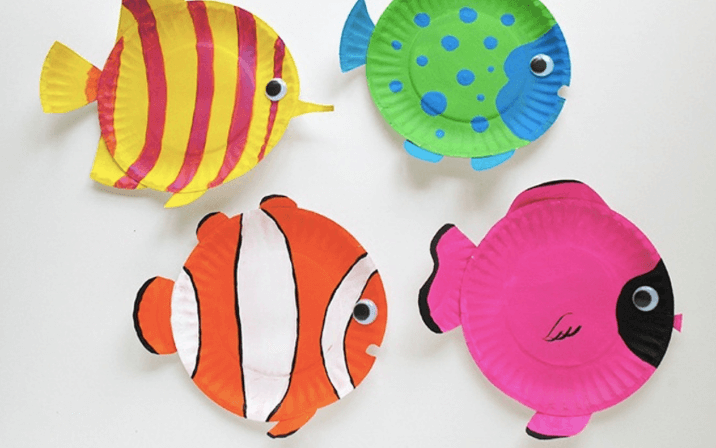
Paper Plate Fish
Summer…beach…ocean…fish…sure, summer and fish go together! In this summer craft, use a whole paper plate to paint the colors and patterns of your little fish. Let your imagination run wild- paint a hot pink fish, a polka dot fish, or Nemo! After the fish’s body is done, cut little triangles out from another paper plate for the fins and tail, and glue them onto the original paper plate. Paint the added features, add a googly eye, and you’ve got a new fish friend!
